
Some of our articles:
- Building a Scalable Notification System with gRPC and Microservices
- How to Send Email Notifications using Python? (With Code Examples)
- A Complete Guide on Notification Infrastructure for Modern Applications in 2023
Method 1: Using the Nodemailer Module
1.1 Installation and Setup
npm install nodemailer --save
Create emailSender.js:
const nodemailer = require('nodemailer');

// Setup Nodemailer transporter
const transporter = nodemailer.createTransport({
  service: 'gmail',
  auth: {
    user: 'your-email@gmail.com',
    pass: 'your-email-password'
  }
});

// ... rest of the code
1.2 Creating a Nodemailer Transporter
const transporter = nodemailer.createTransport({
  service: 'gmail',
  auth: {
    user: 'your-email@gmail.com',
    pass: 'your-email-password'
  }
});
1.3 Setting Message Options
const mailOptions = {
  to: 'test@example.com',
  from: 'your-email@gmail.com',
  subject: 'Subject',
  text: 'Body'
};
1.4 Sending Emails with Attachments
const mailOptionsWithAttachment = {
  // ... other options
  attachments: [
    {
      filename: 'file.txt',
      path: '/path/to/file.txt'
    }
  ]
};
1.5 HTML Emails with Dynamic Content
Install email-templates and pug:
npm install email-templates pug --save
Update emailSender.js as per your template.
1.6 Now, create your email templates.
Let's focus on a common scenario: sending a welcome email for new user registration.
Create subject.pug:
= `Hi #{firstName} #{lastName}, welcome to My App!`
Create html.pug:
h1 Hello #{firstName} #{lastName}
p.
  Welcome to My App! Now your test emails will be safe.
  We just need to make sure your account is real.
a(href='https://example.com/confirmation') Confirm!
Ensure your directory structure looks like this:
├── app.js
├── emails
│   └── welcome
│       ├── html.pug
│       └── subject.pug
1.7 Sending Emails with Dynamic Content
Now, let's modify our Node.js application to use these templates:
// ... (previous code)

// Step 5: Create an email-templates instance
const Email = require('email-templates');
const email = new Email({
  message: {
    from: 'hi@example.com',
  },
  send: true,
  transport: {
    host: 'smtp.mailtrap.io',
    port: 2525,
    ssl: false,
    tls: true,
    auth: {
      user: 'your-mailtrap-username',
      pass: 'your-mailtrap-password',
    },
  },
});

// Step 6: Define user data
const people = [
  { firstName: 'Diana', lastName: 'One', email: 'diana@example.com' },
  { firstName: 'Alex', lastName: 'Another', email: 'alex@example.com' },
];

// Step 7: Send emails for each user
people.forEach((person) => {
  email
    .send({
      template: 'welcome',
      message: {
        to: person.email,
      },
      locals: person,
    })
    .then(console.log)
    .catch(console.error);
});
Replace placeholder values in the code with your actual credentials.
Method 2: Sending Emails with Gmail SMTP
2.1 Gmail SMTP Configuration
npm install nodemailer --save
Create gmailSender.js:
const nodemailer = require('nodemailer');

const transporter = nodemailer.createTransport({
  service: 'gmail',
  auth: {
    user: 'your-email@gmail.com',
    pass: 'your-email-password'
  }
});

// ... rest of the code
2.2 App Password for Enhanced Security
Follow the steps for generating an App Password.
2.3 Sending an Email with Gmail SMTP
Update gmailSender.js:
const mailOptions = {
  to: 'test@example.com',
  from: 'your-email@gmail.com',
  subject: 'Subject',
  text: 'Body'
};
2.4 Advanced Usage: oAuth2 Authentication
Include oAuth2 authentication in gmailSender.js:
// oAuth2 authentication
const oauth2Client = new OAuth2(
  'YOUR_CLIENT_ID',
  'YOUR_CLIENT_SECRET',
  'YOUR_REDIRECT_URL'
);

// ... rest of the code
Method 3: Sending Emails using a Transactional Email API (e.g., Postmark)
Step 1: Sign Up for Postmark and Create API Token
- Sign up for Postmark.
- Create an API token in your Postmark account.
Step 2: Install the Postmark JavaScript Client
npm install --save postmark
Step 3: Create postmark.js
Create a file named postmark.js:
const postmark = require('postmark');

const client = new postmark.ServerClient('YOUR_POSTMARK_API_TOKEN');

const message = {
  From: 'your-email@example.com',
  To: 'recipient@example.com',
  Subject: 'Subject of the Email',
  TextBody: 'Text content of the email',
  HtmlBody: '<strong>HTML content of the email</strong>',
};

client
  .sendEmail(message)
  .then((response) => {
    console.log('Email sent\n', response);
  })
  .catch((error) => {
    console.error(error);
  });
Step 4: Update postmark.js
Replace 'YOUR_POSTMARK_API_TOKEN' with the API token you obtained from your Postmark account.
Method 4: Using SuprSend - Third-Party Multichannel Notification Infrastructure with Node SDK
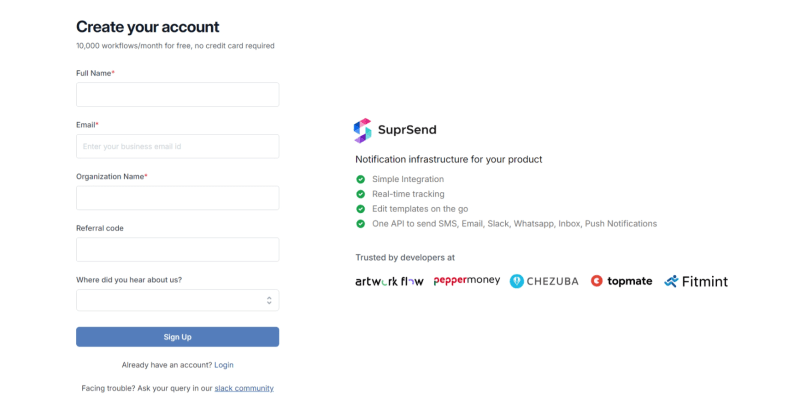
Step I: Log in to the SuprSend Account
Visit the SuprSend login page and enter your Email Address and Password. Try SuprSend for free.
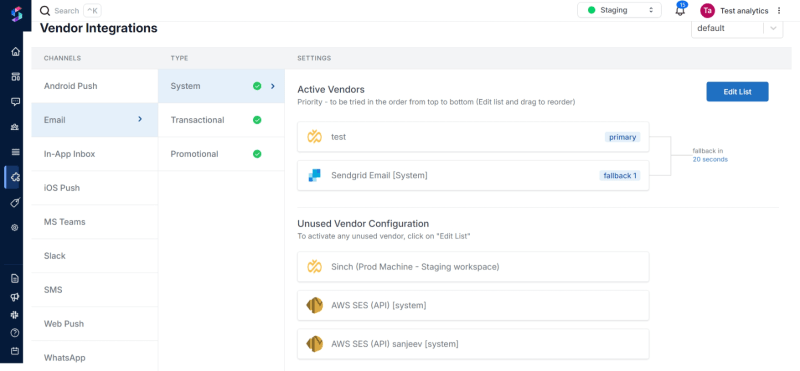
Step II: Integrate with Email(s)
Install SuprSend using npm or yarn.
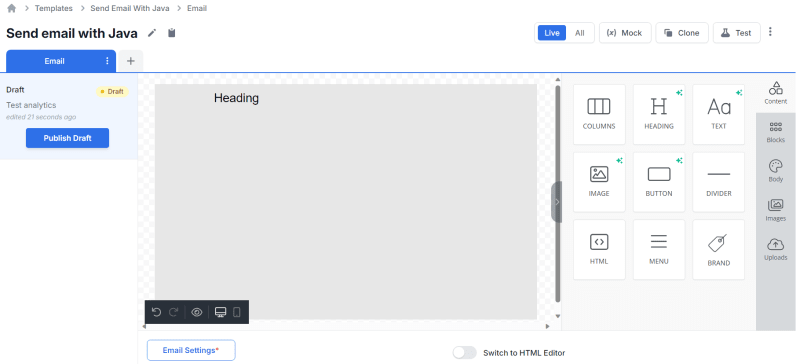
Step III: Create & Load Template
Create templates using the drag & drop editor.
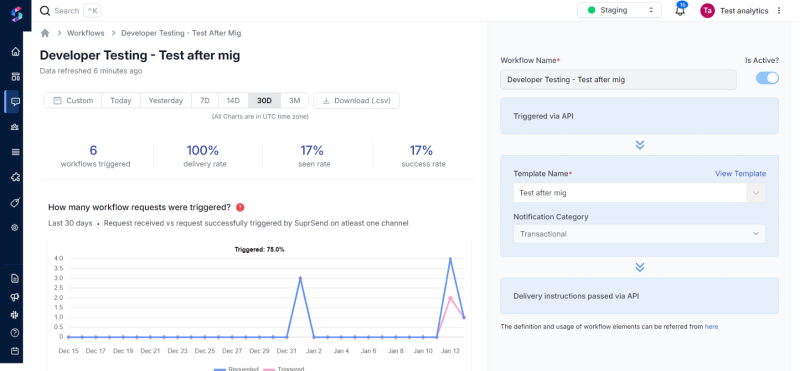
Step IV: Create Smart Flow (Routing)
Define rules and logic for notification flows.
Step V: Trigger a Notification Event via API
Integrate the SuprSend API into your Node application.
        npm install @suprsend/node-sdk

        # to upgrade to latest SDK version
        npm install @suprsend/node-sdk@latest
Installation
          const {Suprsend} = require("@suprsend/node-sdk");

          // Initialize SDK
          const supr_client = new Suprsend("WORKSPACE KEY", "WORKSPACE SECRET");
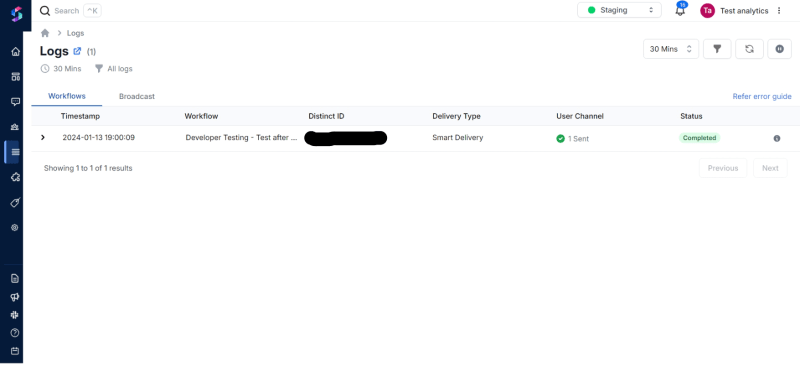
Step VI: Check Event Analytics And Logs
View granular channel-wise and vendor-wise analytics through the unified dashboard. Explore more about logs.
You may want to check out other SuprSend SDKs too. Consider giving us a star after usage. It's free and open.
%[INVALID_URL]{% github suprsend/suprsend-py-sdk %}
%[INVALID_URL]
{% github suprsend/suprsend-react-inbox %}
About the author
Developer from SuprSend.
Comments
Join the discussionNo comments yet. Be the first to comment.


